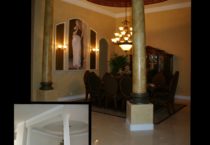
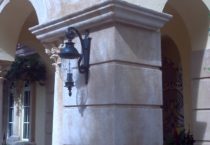
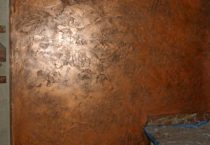
 The classic beauty of marble, here I've shown some faux marble columns that were painted. Painted finishes such as this can instantly change the look and feel of any room. Sometimes a marble has been quarried to the point where it is no longer available... or there is a need to match/add to a marble that already exists.
This is where the hand of a talented decorative artist comes into play. One example would be with having a real marble fireplace and extending the marble to baseboards and crown moulding with a faux marble. There are many reasons for marbling to be done.
Creating Faux marble columns
In order to make a marble finish look authentic.... Thought should go into its placement. You wouldn't expect to find a door to be marble ... nor would you often find a slab of marble that is larger than 5'x10' in size. I'm not saying that there is anything wrong with a fantasy-marbled finish. It's all-dependent on what you're trying to accomplish. ... I'll address "fantasy marbles" a little later on.
View some more examples of faux marble columns and faux decorative finishes.
Ok, enough stalling, here we go...
Marbles have many different characteristics and depending on the type of marble you choose to create, the process of creating the faux marble column can vary wildly. One thing that's pretty constant in creating these finishes is that you work in layers. The reason being is that with a natural marble ... there is depth. You can really look into the marble. There are areas of the marble that are transparent and allow veining and other marble characteristics gently fade into and out of the finish. You need to simulate the same thing in your faux marble columns. It takes layers to create the depth need to simulate the real marble that you're trying to create.
 Do your homework
Let me back-step for a second...Before any layering of transparent finishes can occur, you need to first do your homework. Take a moment to get to know the marble that you are going to attempt to create. Marbles are simply cross sections of hardened Earth... when creating faux marble columns; you really need to pay attention to this. All of the motion and coloring is there and created in a certain manner.Take a drift of color and follow it ... where does it go, why did it go there? ... The more you understand this the better you'll be at replicating it in you faux marble columns.
You can also get out a pencil and paper. Start sketching what you see. Create a drawn version of the marble you want to create. Create a number of versions of this marble. At first you may want to simply "copy" what you see. Once you get that down and feel comfortable in creating your copied versions.... Get a bit braver; combine what you've drawn into your own piece of marble. Give it character ... some places of strength and other places of calm. Create some balance while at the same time not making it look too contrived but having natural variations. When working on a faux marble column ... I’d suggest working the full round simultaneously because what you're creating on one side is going to have to make sense on the opposite side... remember ... cross sections of layered Earth.
 Prepare your surface
Now we're at a stage that isn't so artsy. We're excited to get started with the painting but we can't forget the prep... This is probably the most important part of creating a fine simulated faux marble column finish. Without the proper prep work your final finish may not be what you wanted it to be. Many times the surface that you're getting ready to paint has already been painted with a semi-gloss or high glossed finish.
If this is the case.... Then you need to give your surface a better "tooth" for the new layers of paint to grab onto. If you don't do this, you may find that your finished painting may scratch of peel away. This is often because there wasn't enough grab between the new and old paint layers.
You can use a chemical etch if you're adverse to creating dust ... or you can just pull out some sandpaper and give it a quick scuffing. The next thing you have to watch out for is the texture of the surface to be painted. Remember that when you complete your marble finish ... you're usually going to be putting a gloss finish on top of your painted faux marble column. This gloss finish will show off any imperfection that was present when you started your painting.
Do yourself a favor and catch these imperfections now. You’ll be glad you did in the end.
 And finally...time to start painting
Now it's time to get brave. Applying paint to the surface. I generally start by "sketching" with my brush. Where are my major drifts and areas of strength going to occur? Place them loosely and step back. Does it work for you? Does it represent the sketches that you made? .... No worries if it doesn't look pretty right away.
Remember!!!
We’re working in layers here. Anything you don't like can easily be softened and even erased with subsequent layers. Like I said.... be brave. Go a bit stronger than you want the final finish to be. This under painting has to survive a few layers of finishing. If you go too lightly here, it's going to be lost.
When you are happy with the outcome of your faux marble column.... let it set up a bit. Remember you have layers of paint here.... and they'll need some time to dry before you seal it up. Your marble is painted. Now it's time for some luster. Give the marble a coat or two of clear coat that compatible with the paint that you used. With this you're done ... congrats. You've created your faux marble column. Enjoy your new bit of luxury.
An experienced hand...
If you're a do it yourself type or an artist yourself... I hope that I've given enough insight and inspiration to tackle your own marble finish. But, if you’re looking for an experienced hand then please contact me. I've painted more marble columns than I can remember. Yet every time I work on a new marble finish I find something new. My finishes continue to evolve. I think it’s the artist in me that continues to push my decorative marble columns to the next level.

